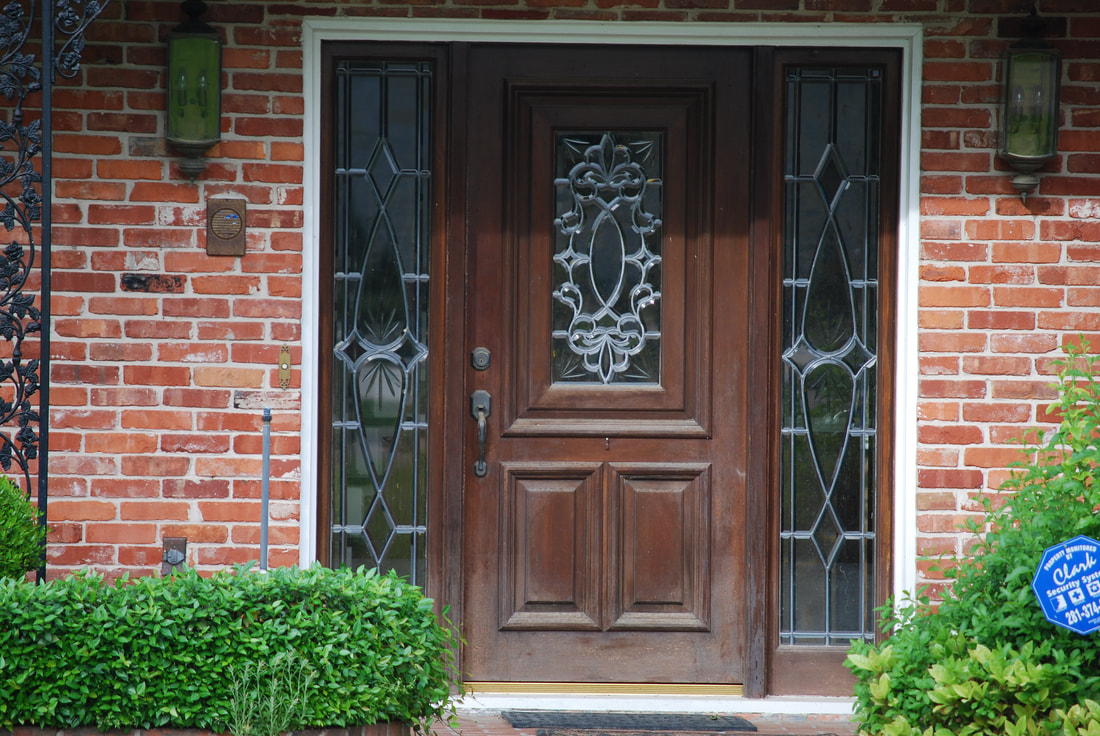
Does Your Front Door Need To Be Refinished?
Your front door says a lot about your home. A beautiful hardwood entry door is the mark of a well-loved home, a welcoming front porch, and a point of pride. Unfortunately, entry doors take a lot of abuse from the elements. If yours is looking a bit shabby, it might be time to spruce it up by refinishing and replacing the hardware.
If you like to do home projects, by following a few simple steps, you can turn an eyesore into the envy of the neighborhood.
Remove the Front Door
Use a hammer and a nail to remove the hinge pins and then carefully remove the door. It’s worth noting that when you do it right, refinishing a wood door can take a couple of days. However, if you start the process early in the day, you’ll have plenty of time to reach the point where you can rehang the door securely in the afternoon.
Make sure you have someone close by. Entry doors can be very heavy!
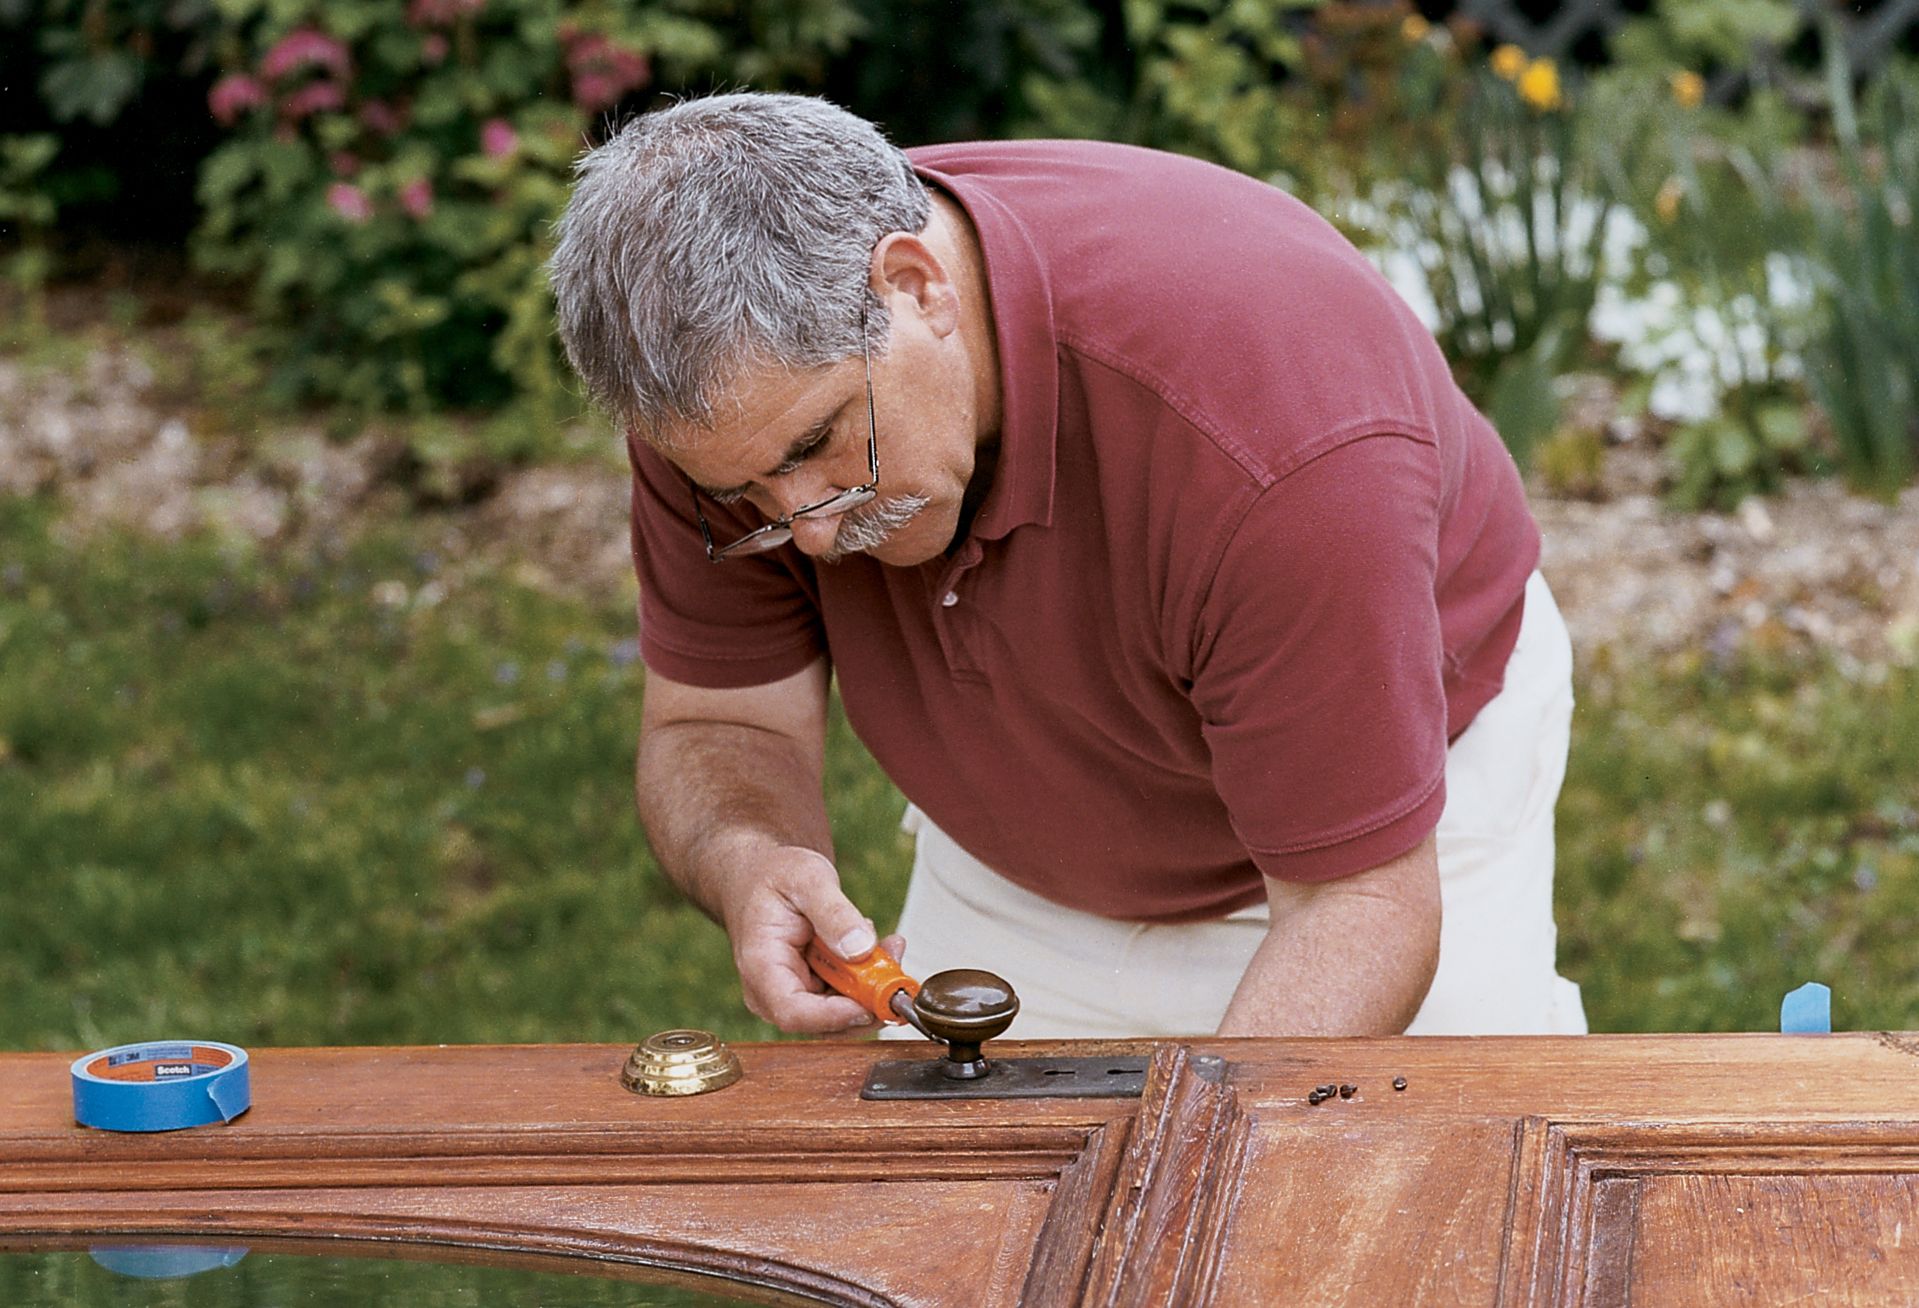
Remove the Hardware
Once you’ve moved the door from your house to your work space, carefully remove all of the hardware. This is a critical step! While you may think you can simply use painter’s tape to work around the hardware, you’ll be disappointed with the uneven results. Take the time to do it right. Trust us, remove the hardware.
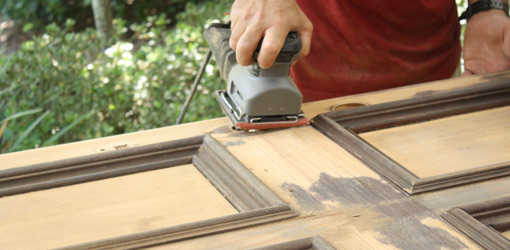
Sand Flat Surfaces
Opton 1: Use an orbital sander and 80 grit sandpaper to quickly remove the existing paint, finish, or weather-damaged wood from the doors flat surfaces. Then, sand again with 100-grit and finally, with 120-grit. There’s no need to go finer at this point; this will provide a smooth finish and an optimal surface for stain, varnish, or paint adhesion. Wipe sanding dust away with a soft rag.
Option 2: Apply paint stripper liquid to chemically strip away all the old finish from the wood surface. Allow 30 minutes for the stripper to weaken the paint. Then, use a scraper to remove the paint off the door surface. You may need to repeat this step until most of the paint is removed. Then, just as above, sand the flat surfaces using 80 grit, then 100 grit, and finally 120 grit sandpaper. Use a soft rag in order to wipe the sanding dust away.

Scrape and Sand Grooves and Edges
Using a small, sharp scraper, carefully reach into the corners of the details and narrow profiles. Gently pull the scraper with the grain, using both hands to apply even pressure. Whatever you do, work carefully to avoid gouging the wood or yourself!
Cut a full sheet of 100-grit sandpaper into quarters and then fold it in half or thirds, whichever is more comfortable for you and sand the molding, grooves, and details with smooth, back and forth motions. A sanding sponge can help you get into the nooks and crannies that your fingers can’t reach. Wipe and vacuum away the sanding dust.
Clean the Door and Dry It
The exterior wood door needs to be cleaned afterwards using natural dish soap (from your kitchen is fine, but you need to make sure that the soap solution is diluted well in water so that the cleaner does not damage the wood.) If you don’t want to use soap, another option is to use microfiber towels. After this, dry the door with paper towels or cloth. Ensure that the wood is dried out completely. Allow it to set for some time before performing the next step.

Reapply the Finish
This is the final and the most important task to refinish the door. Here, you need to refinish the door and then reinstall the exterior door.
- If there is any kind of damage done to the door, this is the right time to fix it. For this, you need to collect up all the sawdust which you have created in the sanding process and mix it using epoxy or glue, and carefully fill up any crack, chip, gash or dent. There are also ready-made wood fillers and putties that come in different colors. If you use any of these, pick a color that is darker than your stain.
- Apply the stain with a stain rag or high-quality China bristle brush. Keep your stain application gentle and unified, painting with the grain of the wood. Be sure to wipe away and drops of excess finish from dry surfaces immediately.
- Once the stain is dried, check the outcome and apply any correction needed.
- Apply sanding sealer and let it dry.
- Once dried, sand the sealer with 220 grit sandpaper. Touch the wood surface and make sure the surface is smooth.
- Apply the topcoat and allow the door to dry thoroughly in a dust free environment.
- Now you can reinstall the door.
Reattach Hardware, Weatherstripping, and Admire
Once your final coat has had ample time to dry, it’s time to reattach the hardware and weatherstripping and admire your hard work. Congratulations! You’ve successfully refinished your wood exterior door!